Nested Content
This is the second article in the series about the various block editors for Umbraco.

Nested Content lets editors build lists of content. When Umbraco V8 was released, DTGE was not ready for V8. Creating custom grid editors based on AngularJS required a lot of development work and Nested Content has helped massively in such a scenario. Nested Content was originally a package developed by UMCO(Lee Kelleher and Matt Brailsford, awesome Umbracians!) and was made a part of the core in Umbraco v7.7.
The idea behind Nested Content is to use document types marked as "element types" to create blocks of content. Element types are document types without a template and they can only be used in conjunction with Nested Content(element types also form the basis of other block editors like DTGE, Contentment Content Blocks, the Bento Editor, and Perplex Content Blocks) or Block List Editor. They cannot be used to create content that resides in the content tree.
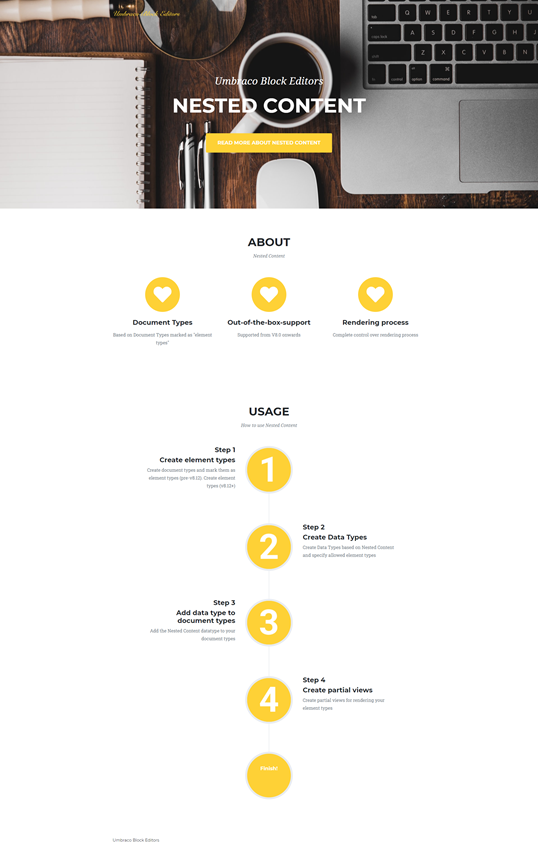
In this article am going to build a page that looks as shown below and I will be explaining the configuration and code to build the Hero component. Code for the entire page is available in my repo.
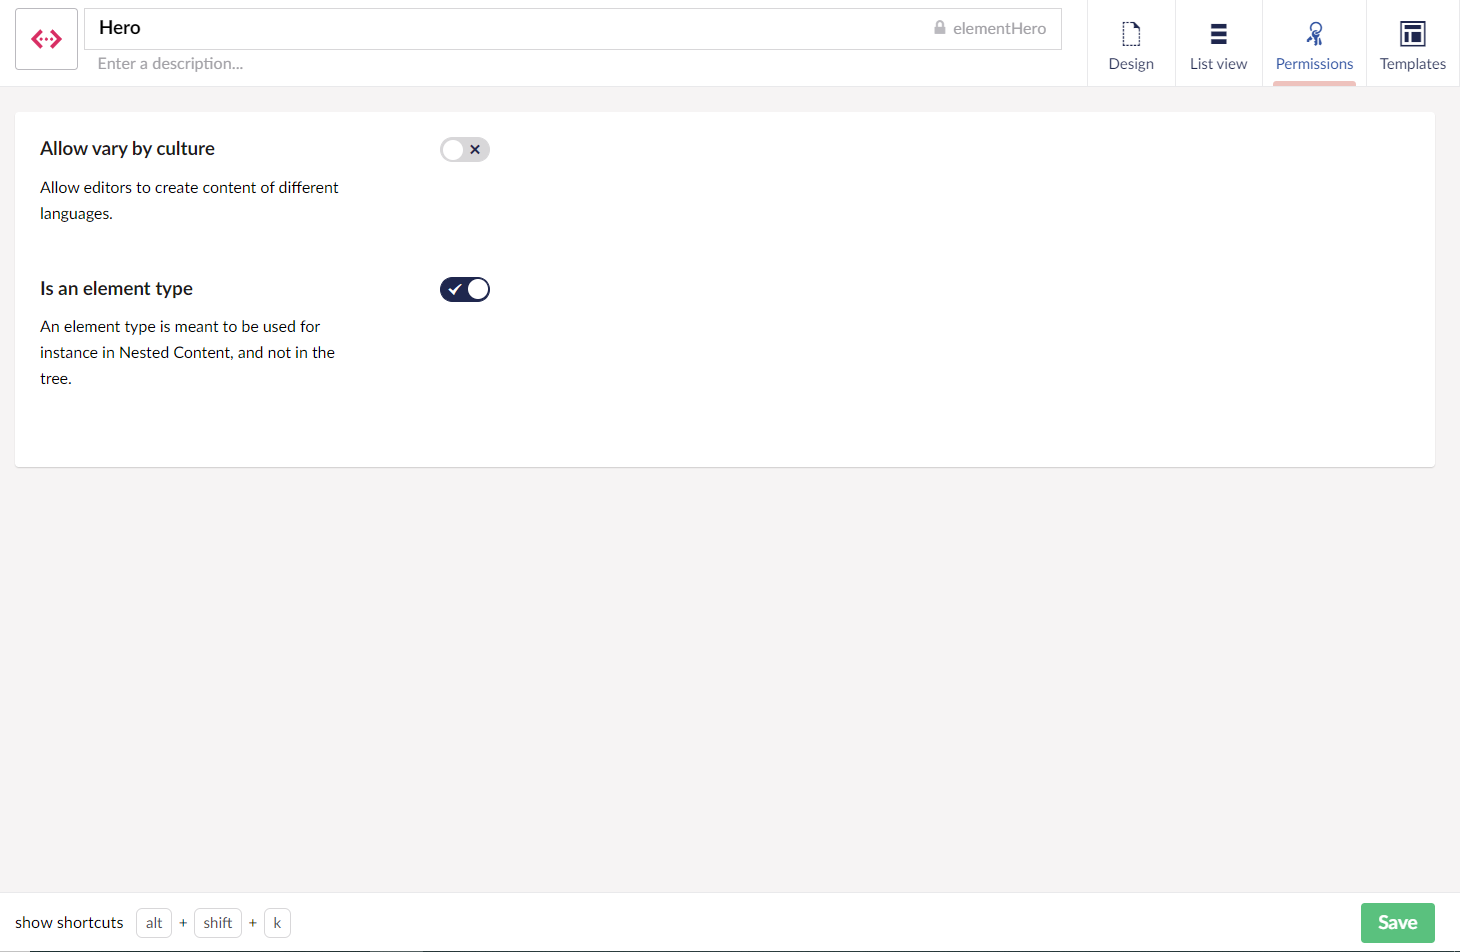
To create Nested Content you create a document type without a template and mark it as an element type (pre 8.12) or create an element type (V8.12+).
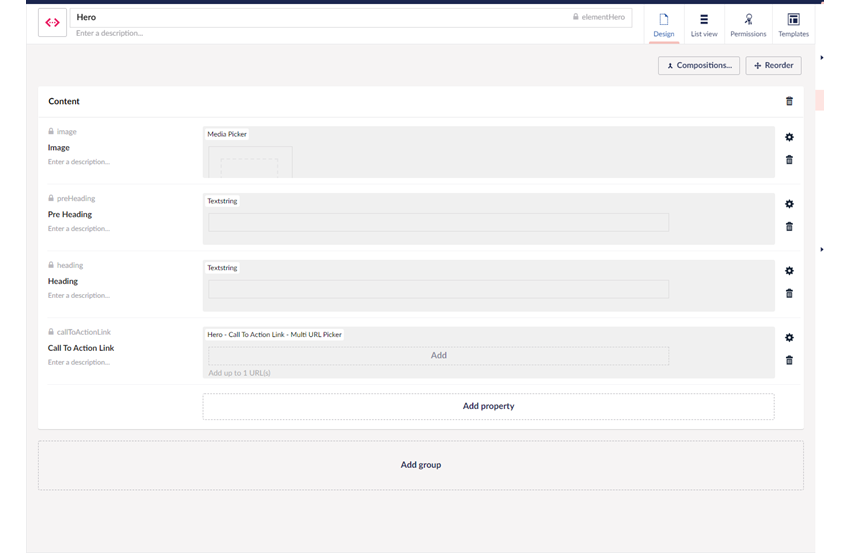
This is how my Hero element type looks like.
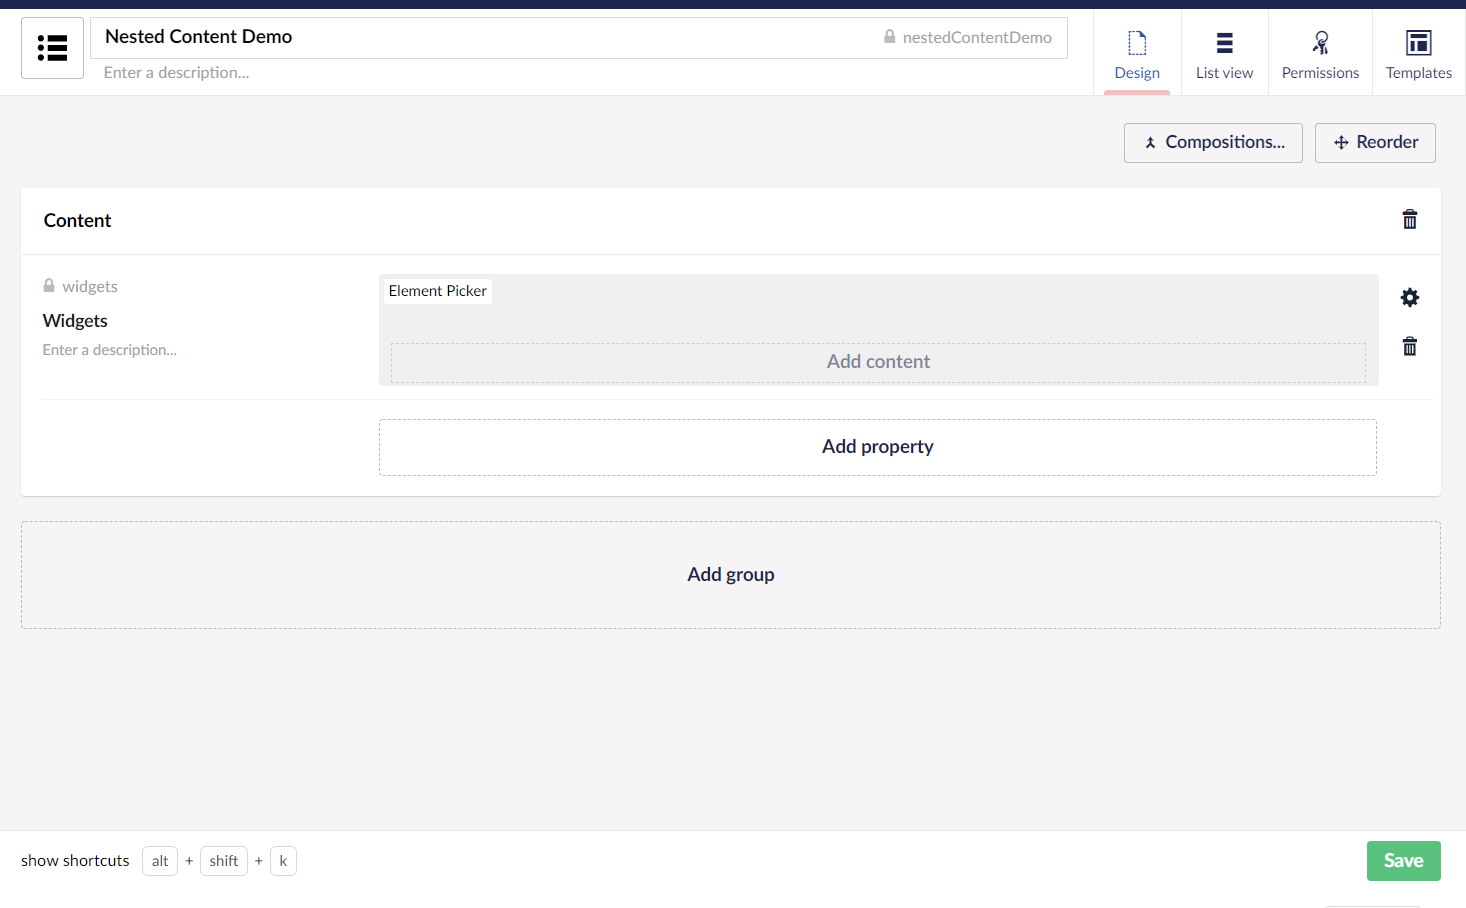
Now I need to configure a data type based on Nested Content. Only document types marked as element types can be used to configure the data type. A template can be specified for each element type which shows as the name/label in the backoffice during content editing. It is an extremely popular feature and having a good name template for your element type is a recommended practice. I usually use a user-friendly name and index as the template. The index helps when validation errors occur in the backoffice and it becomes easy for the editors to identify where the validation has failed. If I have nested items inside a nested content type I usually display one of the property values as the template of the nested item in the format {{propertyalias}}. This helps my editors identify the nested items.More information about name templates can be found here. The data type can now be added as a property to my document type. Shown below is my data type configuration for Nested Content.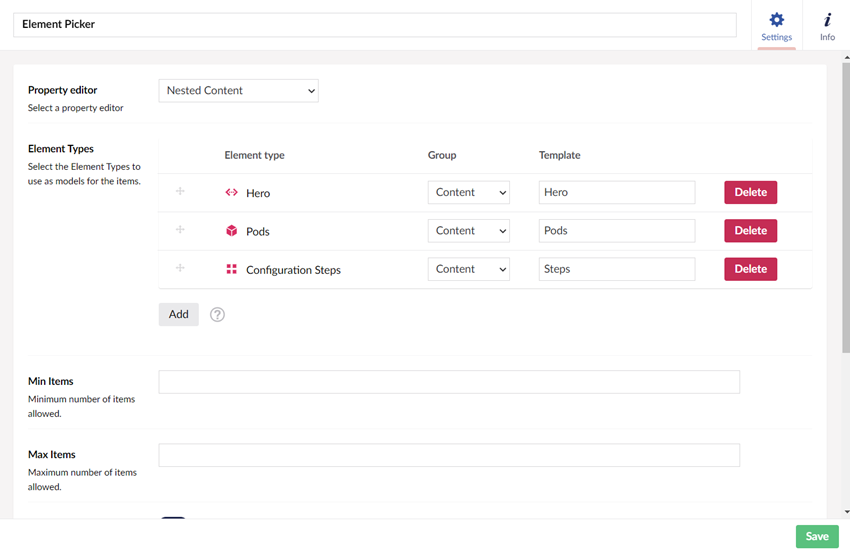
My document type which uses the above data type is shown below.
Nested Content data types can be used in single item mode (Maximum Items = 1 in data type configuration) or Multiple Item Mode (Maximum Items left blank or a number more than 1 specified). In single item mode, a maximum of one content item based on any of the allowed element types for the underlying data type can be entered. In multiple item mode, any number of content items can be added if the Maximum Items is left blank in the configuration, or the number specified can be added.
Nested Content items return an IPublishedElement in single item mode or IEnumerable<IPublishedElement> in multiple item mode. Since Nested Content is based on document types, Models Builder models can be used to strongly type your partial views.
Rendering Nested Content
I will start off with the template for the page here. To render my template, I loop through the Model.Widgets property in my document type. The widget is an IPublishedElement.
@inherits Umbraco.Web.Mvc.UmbracoViewPage<ContentModels.NestedContent>
@using ContentModels = Umbraco.Web.PublishedModels;
@{
	Layout = "_Layout.cshtml";
}

@foreach(var widget in Model.Widgets)
{
	@Html.Partial($"{widget.ContentType.Alias}", widget)
}
I then use a bit of naming convention whereby my code looks for a partial view with the same name as the alias of the widget. I pass in the widget, an IPublishedElement, as a model to my partial view. And in my partial view, I can query the properties of my element type and render the information.
@inherits UmbracoViewPage<ElementHero>

<header class="masthead" style="background-image:url('@Model.Image.Url')">
    <div class="container">
        <div class="masthead-subheading">@Model.PreHeading</div>
        <div class="masthead-heading text-uppercase">@Model.Heading</div>
        <a class="btn btn-primary btn-xl text-uppercase js-scroll-trigger" target="@Model.CallToActionLink.Target" href="@Model.CallToActionLink.Url">@Model.CallToActionLink.Name</a>
    </div>
</header>
It is possible to move any business logic from your views into a controller and pass a custom view model into your views. A working example can be found here.
Points to Remember
- Simple editor interface
- Models Builder support
- Validation in the backoffice to help editors
- Full control over rendering
- Editors have the ability to copy and paste the content of a single Nested Content item or the entire property.
- Editors cannot get an idea of the layout and introducing further nesting inside a Nested Content item can quickly get very complicated and less editor friendly.
- Accessible controls
- No preview inside the backoffice
- Settings for the block editor has to be baked in as a part of the element type and thus forms a part of the content
- Can quickly get very complex if you have multiple levels of nesting
- Can be hard to build layouts with Nested Content.
Use Cases
Nested Content can be used as a block editor to build web pages. Editors can build pages using the various nested content items available on the document type. I see Nested Content as a page builder rather than a layout builder.