Accio Harry Potter - Dialogflow Set Up
This is a follow-up article to the article I wrote for the Umbraco HQ blog. In the article, I wrote about how to integrate Umbraco Heartcore to a Conversational Action in Google. In this follow-up article, I will summarise a few details about Dialogflow set up for the Conversational Action.
Actions on Google lets you extend the functionality of Google Assistant with Actions. Google Assistant is an AI-powered virtual assistant developed by Google. Google Assistant is available on many smart-phones, speakers, smart displays and many more devices. You can stream music, listen to the news, ask for recipes, translations or even plan your day with the help of Google Assistant. Actions on Google is available for mobile devices – for smart home devices to control your devices connected to Google Home App and to build custom conversational experiences like chatbots.
With Conversational Actions, users interact with your Action for Google Assistant through natural-sounding conversation. Conversations Actions are invoked by the user and they continue until the user chooses to exit using pre-specified phrases or your Conversational Action denotes an end to the conversation. During a conversation, user inputs are transformed from speech to text by Google Assistant and sent to your conversation fulfilment as JSON. Your conversation fulfilment parses the JSON, processes it and returns the response in JSON to Google Assistant which converts it into speech and presents the response to the user.
Picture Courtesy: https://developers.google.com/assistant/conversational/df-asdk/overview
In my example, I am going to use Dialogflow for conversation fulfilment. Dialogflow is a natural language understanding (NLU) platform, a very powerful tool, to build conversational actions. Developers can create an agent, train the agent using phrases that compliment their conversational action and use a webhook to fulfil the request from the user. The user request or the user’s intent is understood by the Assistant and forwarded onto the Dialogflow Agent which processes the request and sends a response back to the Assistant.
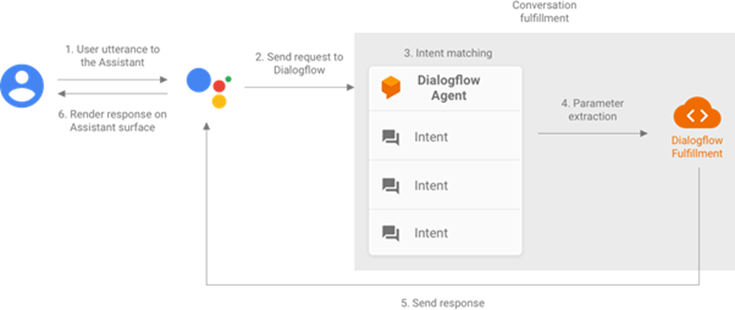
Picture Courtesy: https://developers.google.com/assistant/conversational/df-asdk/overview
The starting point for creating a Conversational Action is the Actions Console. A new project(Actions Project) can be created from the dashboard here. I chose Custom as the option when asked about the kind of Action.
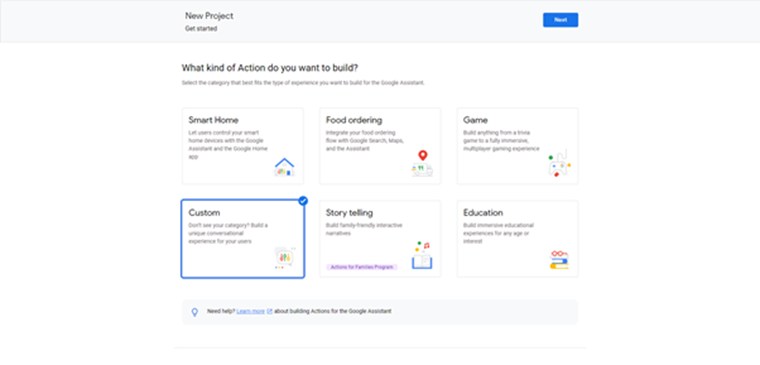
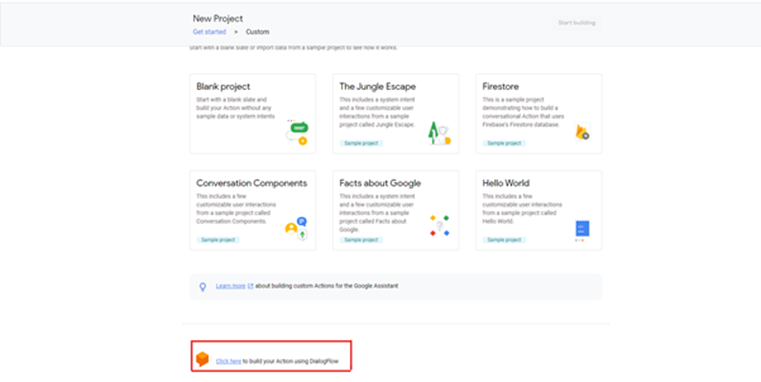
A little tip: Google has introduced a new way of fulfilment called Actions Builder which is the default way of fulfilment for Conversational Actions these days. It is very different from Dialogflow. So if you miss the little link which says “Click here to build your Action using Dialogflow” then your Action will default to Actions Builder. While developing the Conversational Action I missed that link and I was all over the place!
Once this is done I get presented with the Overview screen of my Conversational Action. Since I am fulfilling my Action using Dialogflow the details entered in my Actions project are mainly for getting my project into production.
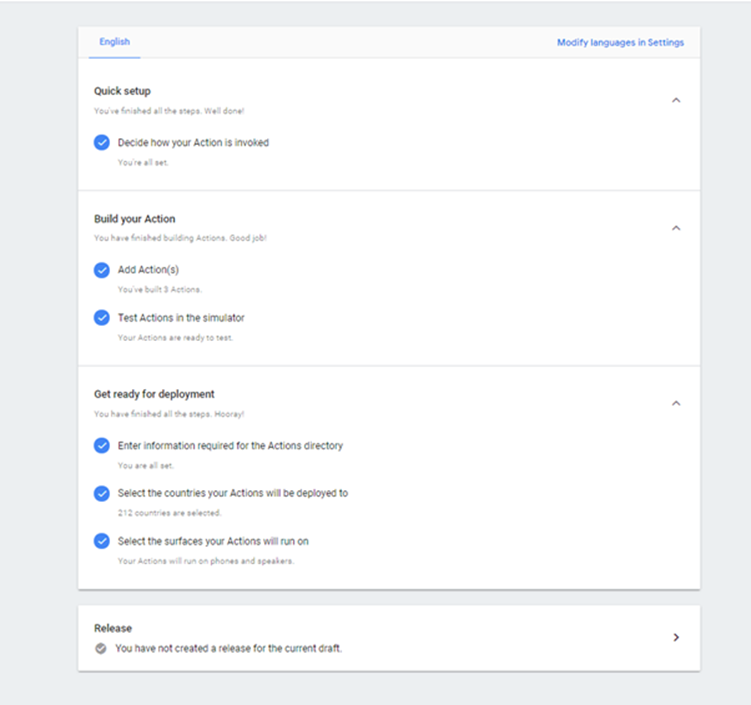
The first thing I need to specify is the display name or the invocation name for my Conversational Action. This name will be used by the user to invoke the action. To start a conversation with Google Assistant, a user usually starts off with the phrase “Hey Google” or “Ok Google”. This is when the Assistant starts listening to the user. From there on, the Assistant tries to understand the Invocation from the user’s utterance and route the request appropriately. For e.g. to talk to my Conversational Action one could say
- “Hey Google, talk to Hogwarts World”
- “Ok Google, speak to Hogwarts World”
- “Hey Google, tell me about Harry Potter from Hogwarts World”
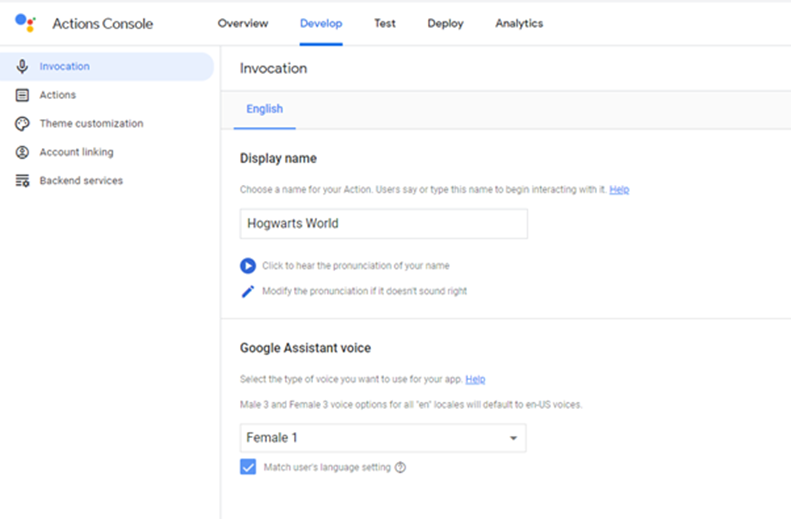
The next step is to build the Actions. Confusing terminology, but an Action is what you want your Conversational Action to do. In my example, it is getting information about a character. Since I am using Dialogflow for fulfilment I get redirected to Dialogflow and a new agent can be created. For every action that I wish to have for my Conversational Action, I can define intents. Intents are unique names that are defined by developers for every action. Against each intent, a set of training phrases can be specified. These phrases are common conversational, natural language phrases. When an intent is saved the agent training starts and it forms a Machine Learning Model behind the scenes. When the user utters a phrase the Assistant tries to find a match for the phrase against the intents specified.
In my project, I want to get information about a character from the Harry Potter series and I have defined an intent called Facts Intent for this. I have specified a series of phrases to map to the intent. As you can see all the training phrases are natural conversation sounding phrases that a user might say to ask for information about a character. The more the number of phrases the better training the Assistant will receive behind the scenes. There will be a higher rate of the user’s conversation ending up with a result thereby increasing the quality of your Conversational Action.
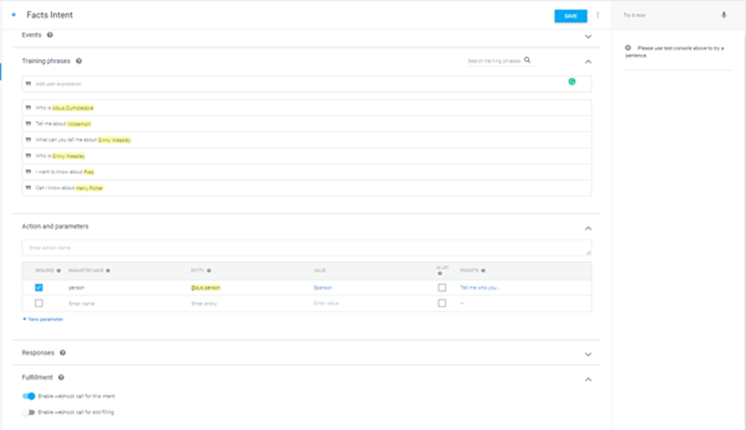
The user might ask about different characters, so I need a way to catch the names of the characters. For this Dialogflow has the concept of parameters. When an intent is matched at runtime, Dialogflow provides the extracted values from the end-user expression as parameters. Each parameter has a type, called the entity type, which dictates how the data is extracted. My parameter(character) is a person so I give it the name person, map it to the entity @sys.person and specify a value. The value is the name of the parameter used for programming purpose and is the key for the parameter in the JSON request. Entities are similar to data types and define the type of the parameter. There are system defined entities available out of the box with Dialogflow, they are prefixed with @sys. In my example, the entity @sys.person is a system-defined entity. You can define your own entities if needed.
 "parameters": {
      "person": {
        "name": "Hagrid"
      }
    }
JSON Sample of the parameter in the request body
In my example, I have made my parameter required and suggested some prompts so that the request won't be forwarded for fulfilment without a character name specified. Once a parameter has been specified, highlighting the character name in the training phrases helps me annotate it as a parameter. This helps the agent understand the various phrases, what kind of parameters to expect and which part of the phrase forms the parameter. Click the Save button to save the details and it will start training the agent on the intents and phrases you have specified.
Note: Dialogflow is a very complex and smart platform. You can set up the agent to adapt to the speech, i.e. constantly learn from the user conversations, train itself further improving the quality of your Conversational Action.
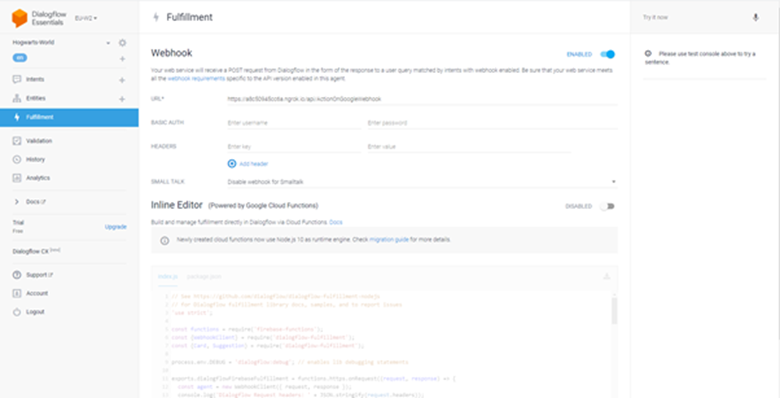
For my webhook fulfilment, I am using an Azure function. I am using nGrok to test my Azure Function in development. You can read about how to use nGrok here. Once my Azure Function is running on nGrok I can head back to my Dialogflow agent and use the url of my local Azure Function in the Fulfillment Screen. After saving the details, I should be able to test my fulfilment using the “Try It Now” option on the right.
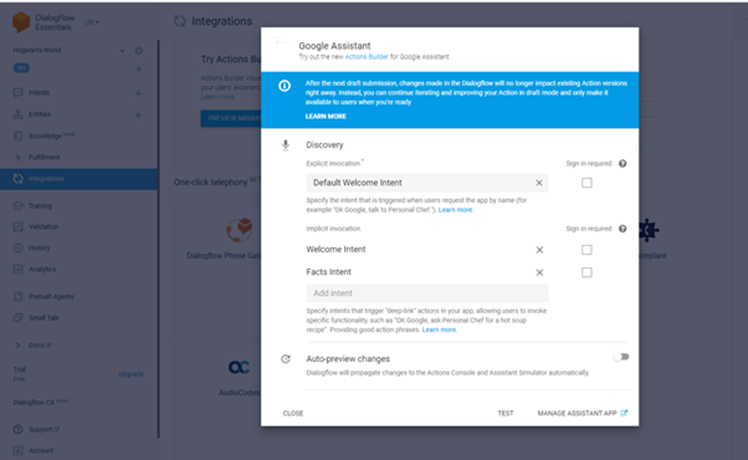
Once I have tested my intent fulfilment, I can integrate my Dialogflow Agent to my Actions Project using the Integrations Screen before heading back to the Actions Project to test my Conversational Action using the simulator.
Back in the Actions Project, I should now see my actions.

Click on the Test Tab to test the Conversational Action using the Simulator. The simulator in the Actions console lets you test your Action through an easy-to-use web interface that simulates hardware devices and their settings. You can test your phrases and validate the results. You can also test against various devices and understand the experience and adjust the response if needed.
You can read my article on the Umbraco HQ blog here.


